


8 Best Steps to take Screenshot in Windows 10 and 11. You may need to save what is on your screen at times. You may notice something you want to share with friends or family or something you want to save for future reference. Fortunately, whether you’re using Windows 10 or 11, there are a few simple methods to take screenshots of your whole – or partial – screen.
Although Microsoft no longer sells Windows 10, the company will continue to support the operating system until October 2025. So you don’t have to upgrade to Windows 11 just yet, and you can keep using these screenshot tactics for a few more years.
8 Steps How to take Screenshot in Windows 10 and 11
Here’s how to take screenshots using built-in tools and other shortcuts in Windows 10 and Windows 11 so you can determine which you prefer.
Snip & Sketch
The Snip & Sketch tool is more convenient to use, share, and annotate screenshots than the previous Snipping Tool. It can now grab a screenshot of a desktop window, which was a strange absence when the app was initially released and kept us using Team Snipping Tool until recently.
With the keyboard shortcut Windows key + Shift + S, you may call up Snip & Sketch with ease. The Snip & Sketch tool is also known in the alphabetical list of programs accessible via the Start button and in the notification panel, where it is labeled Screen Snip. You may search for the keyboard shortcut if you require help remembering it. (If you often take screenshots, we suggest pinning the app to the taskbar.)
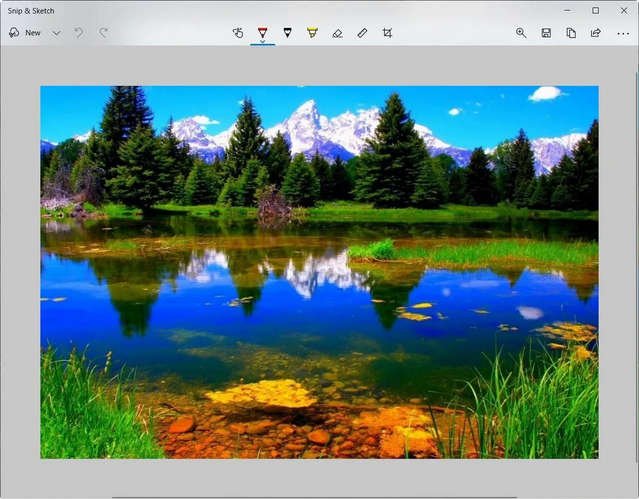

Either the keyboard shortcut or the notification button will cover your screen and open a little menu at the top that lets you pick the screenshot you wish to take: rectangle, freeform, window, or full-screen. When you take a screenshot, it is saved to your clipboard and shown as a message in the lower-right corner of your screen for a brief period. To edit, save, or share the screenshot, open it in the Snip & Sketch app by clicking the notification. (If you missed the notification, extend the notification panel, and it will be there.)
If you extend Snip & Sketch from the Start menu or search for it, the Snip & Sketch window will occur instead of the little panel at the top of the screen. To begin a screen capture and spread the tiny panel, click the New button in the top left corner. This is an additional step but lets you delay a screen capture. To wait a snip for 3 or 10 seconds, click the down arrow next to the New button.
Snipping Tool
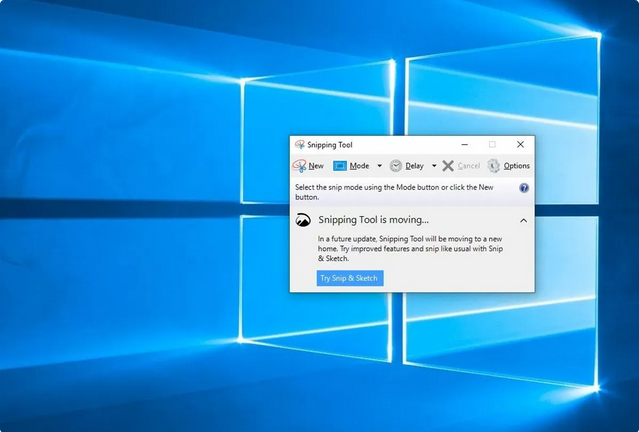
Since Windows Vista, the Snipping Tool has been known. Windows has warned for many years that the Snipping Tool would be phased down, yet it still exists in Windows 11. The Snipping Tool has been released from the Start menu app list but is still readily accessible via the search bar.
To begin the screenshot process, connect the New button. The rectangular snip is the bankruptcy, but you may also take free-form, full-screen, and window snips.
Snipping Tool does not automatically save your screenshots; you must explicitly keep them in the tool before exiting, although it does copy your grabs to the clipboard.

Print Screen
Tap the Print Screen key (PrtScn) to capture your complete screen. Your screenshot will be transferred to the clipboard rather than kept as a file. Open an image editing tool (such as Microsoft Paint), paste the screenshot into the editor, and save the file.
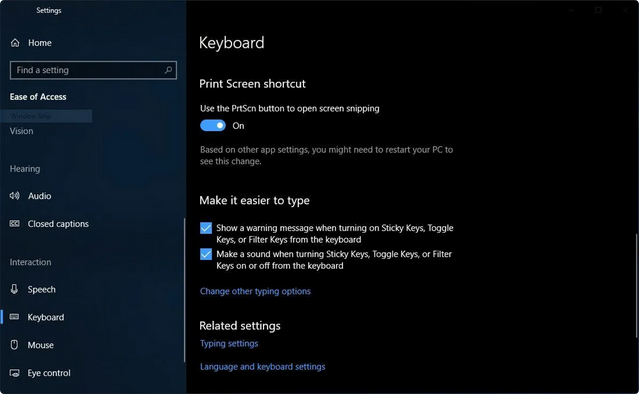
By heading to Settings > Ease of Access > Keyboard and switching on Use the PrtScn button to open screen snipping under Print Screen Shortcut, you may also set the PrtScn button to open the Snip & Sketch tool.

Windows key + Print Screen
Call the Windows key + Print Screen key to capture your whole screen and immediately save the screenshot. Your screen will temporarily dim to signify that a screenshot has been captured, and the screenshot will be saved to the Pictures > Screenshots folder.
Alt + Print Screen
Use the keyboard shortcut Alt + PrtScn to screenshot the active window quickly. This will snap the currently open window and copy the screenshot to the clipboard. You’ll need to open the picture in an image editor to save it.
No Print Screen key?
If your computer lacks the PrtScn key, don’t worry; Microsoft provides another keyboard shortcut. To take a screenshot, use the Fn + Windows logo key + Space Bar. After that, it will be saved to the Pictures > Screenshots folder.
Game bar
Whether you’re playing a game or not, Screenshot in Windows 10 and 11 you may utilize the Game bar to snap a screenshot of the screen. To begin, activate the Game bar from the settings page by selecting Record game clips, screenshots, and broadcasts using the Game bar. Also To call up the Game bar, once enabled, hit the Windows key + G. To bring a full-screen screenshot, click the screenshot button in the Game bar or use the default shortcut Windows key + Alt + PrtScn. To set your Game bar, Screenshot key board shortcut, go to Settings > Gaming > Game bar.
Windows Logo + volume down
If you have a Microsoft Surface device, you can take Screenshot in Windows 10 and 11 of the full screen using the physical (well, physical) buttons, just as you would on any other phone or tablet. Keep down the Windows Logo touch button at the base of your Surface screen, and then hit the physical volume-down button on the tablet’s side to do this. The screen will temporarily dim, and the screenshot will automatically be committed to the Pictures > Screenshots folder.